If you aren’t aware of it yet, Google Analytics 4, also known as GA4, is considered the next generation of Google Analytics launched by Google in October 2020. When we compare this to the old universal analytics properties, you can use GA4 and apply it to websites and an application.
GA4 delivers in all categories. With its outstanding performance in tracking the latest market trends or customer behaviors on all devices and platforms, individuals can learn to use Google’s advanced learning models. This essentially provides you with a better graphic on the ROI for your business and long-term marketing plans.
How to create a new Google Analytics account?
Starting off, you will need to create a Google Analytics account if you don’t have one that exists already. The great news is that when creating a new account, Google Analytics 4 will automatically become the default property for you.
Step 1: Log onto your Google account and head over to https://analytics.google.com/analytics/
Step 2: Click on “Start Measuring”

Step 3: Input a name for your account (This will usually be a company name). You can then click “Next” after a name is provided.

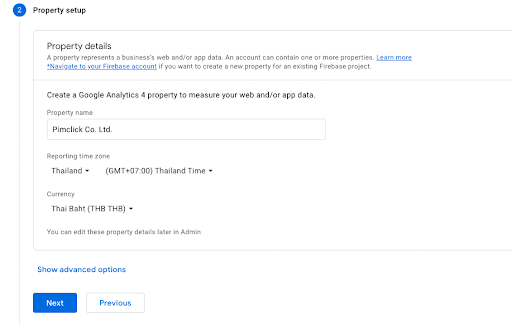
Step 4: Provide a “Property Name” and also select the appropriate Reporting time zone and Currency.
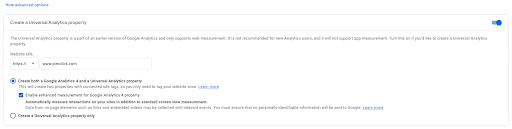
Step 5: If you would like to make a Universal Analytics Property with the GA4 analytics property, then just head over to the “Show Advanced Options”.

Step 6: Clicking the “Show Advanced Options” will allow you to toggle an option on the right-hand side of Create a Universal Analytics property. After this, you can input a website URL and select options of creating both a Google Analytics 4 and a Universal Analytics property or Creating a Universal Analytics property only.
Step 7: Provide details about your business in the “About your business” section. After inputting all details, hit “Create”.

Step 8: Check all relevant fields and click “I accept”

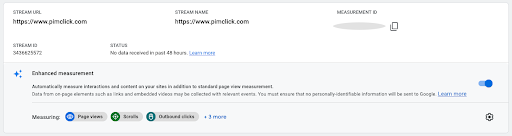
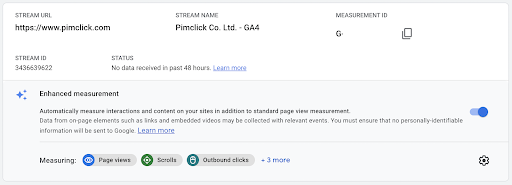
Step 9: After accepting the terms, you will head directly to “Web Stream Details” where you can see your measurement ID in the top right corner.
How to upgrade to GA4 Property from existing universal analytics property?
There are those who already have a universal analytics property. If you would to upgrade to Google Analytics 4 (GA4), then you can simply follow these steps:
Step 1: Select “Admin” and you will be shown an admin console of the Universal Analytics Property
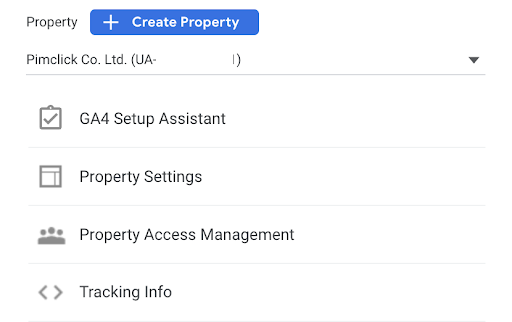
Step 2: Select “A4 Setup Assistant” in the property section
Step 3: You will be shown a small introduction about the Google Analytics 4 Property Setup Assistant. Simply select “Get Started”

Step 4: After getting started, Click on “Create Property”

Step 5: Select “See your GA4 property” click the arrow pointing right in the “Tag installation” section and head over to the “Data Stream”

Step 6: The “Data Stream” screen will have an arrow pointing to the right again that you should click to lead you to “Web Stream Details”

Step 7: This is where you can now see your Measurement ID for the GA4 property in the right corner
This is generally how you can set up a Google Analytics 4 account for those who don’t have one yet or have an existing Google account. In the next article, we will be talking about the steps of adding a GA4 Tracking code to your websites with and without Google Tag Manager.
Pimclick is a digital marketing agency that has studied the tools of Google and how to optimize various areas to get to the top of the page. Understanding Google has given us the ability to assist our clients with improving their SEO, SEO auditing, and On-site and off-site SEO. If you would like to view our services, you can simply reach out to us.